
Well, anyways, for the past few weeks I have been working on building the frames that make up the main structure of the boat.
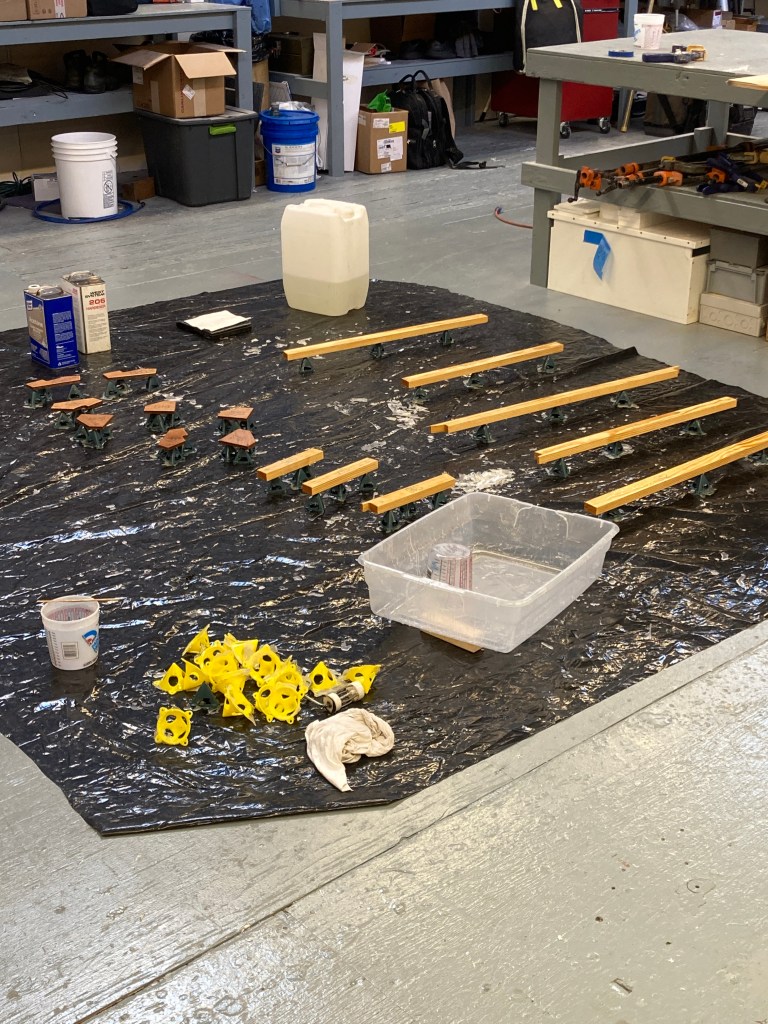
First, I made sure everything got a good double coating of epoxy resin to help seal out any moisture intrusion in the future. I did this by using a large clear plastic storage tub propped up at one end. I would mix the epoxy and pour it into the tub then use a West Systems 800 foam roller cover, and some rubber glove hand action, to apply the resin to the wood pieces. I found that by using the tub the epoxy was spread out and didn’t go off as fast as in a pot. I was able to minimize the mess and some loss as the excess resin drained back into the tub and, after I was finished, I would let the resin harden then simply pull it carefully out of the tub and clean the tub for reuse!
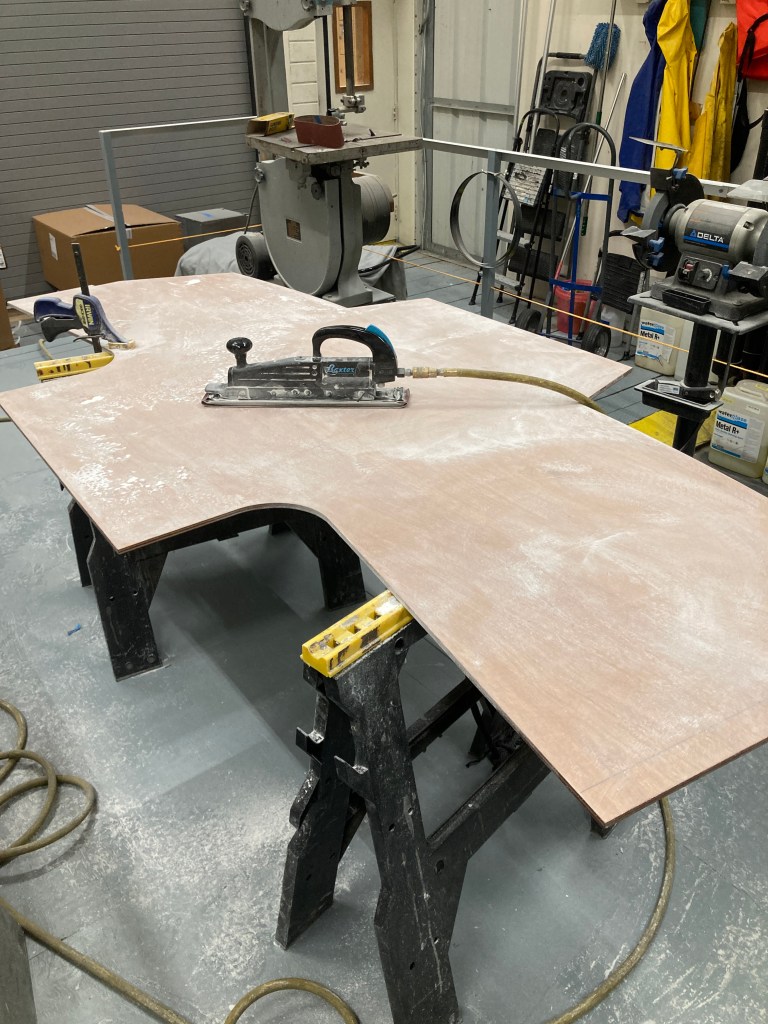
Using this method I was able to apply nice thick coats that allowed me to feel that two treatments was sufficient for good coverage. In between coats, once the resin had hardened, I used some scotch brite pads to scuff up the surfaces followed by a solvent wash. I also used many “painters pyramids” to prop up the pieces off of the floor. This allowed me to do all sides in one shot. Once the pieces were cured it was a fair bit of sanding to get them level and the inline air sander definitely helped! If you’re going to use this type of sander it is important to have a dry, regulated, air supply at no more than 90psi or it won’t function correctly.


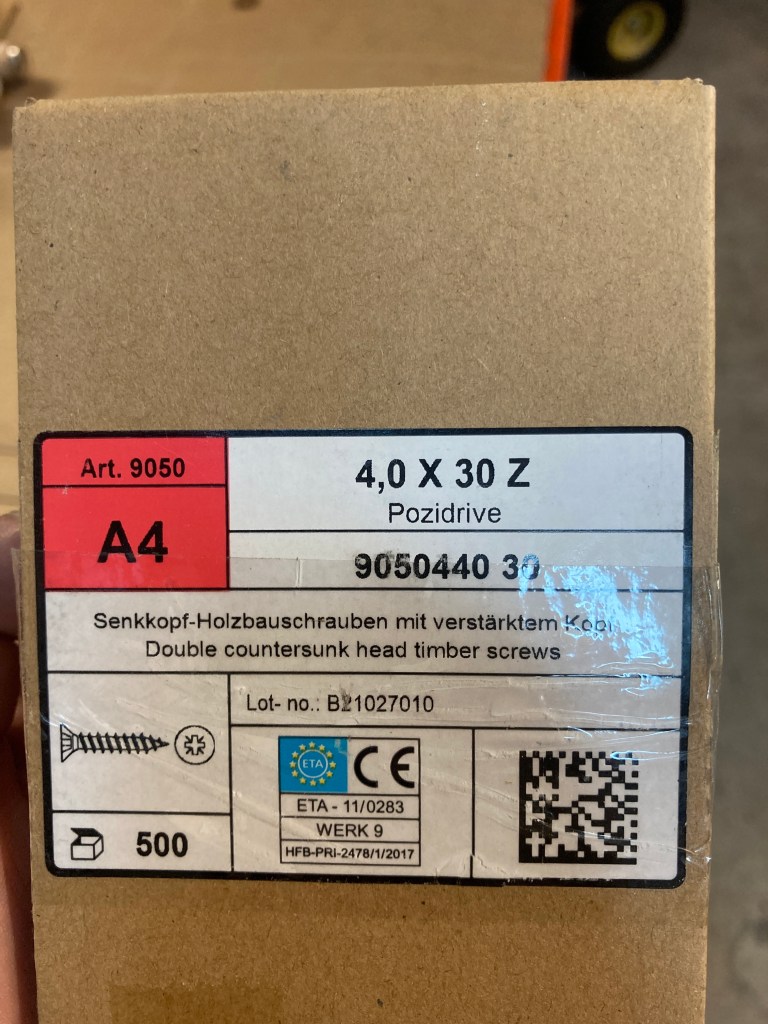
Once I had enough pieces coated I was able to begin assembling the frames. I began with the transom as I was able to use the plywood piece with the cnc pen lines drawn on it to align the parts correctly. Then it was a matter of checking and triple checking the measurements to ensure that everything lined up. I would then hold the pieces in place while I drilled and screwed the gussets down to hold the pieces together. I used A4 stainless, M4 x 30mm, chipboard screws that I special ordered from England to meet the class requirements. On the frames that have no plywood backer, to help guide the placement of the pieces, I used the laser level to help line up the centerlines of the top and bottom pieces. It is very important to make sure that all of the joints are ‘right and tight’ to guarantee a solid foundation as this little craft is likely to take a beating.


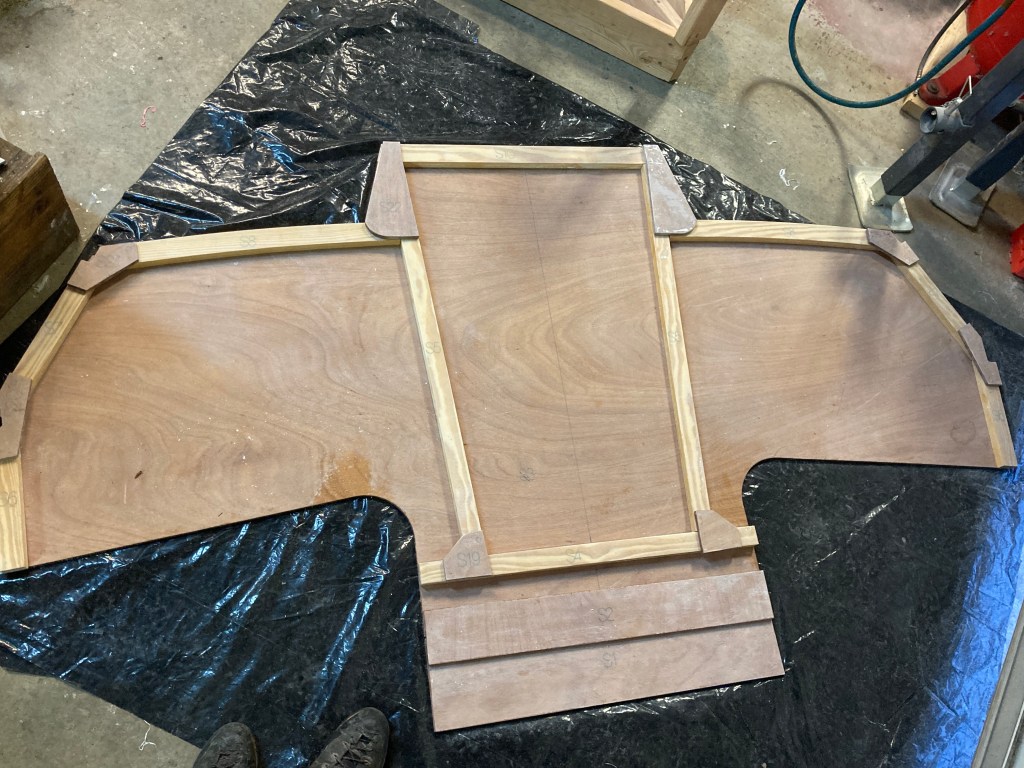
After I got the pieces fitted together, and matching the measurements on the plans to the mm, I began gluing them together with thickened epoxy. I used West System 105 resin with the slow hardener to give maximum working time. I mixed in West System 404 High Density filler to thicken the resin as this ensures a super strong bond.
I used a toothed spreader to distribute the epoxy mixture evenly across both mating surfaces and all of the joints. I would carefully remove one gusset at a time, clean the surfaces with solvent and apply the epoxy. I then screwed the gusset back in place coating the screws with epoxy as well. It started out pretty rough but eventually I got the hang of making nice fillets with the excess epoxy that squeezed out when screwed together. Very satisfying!

I found that some of the more complicated frames required quite a bit more thought and planning to get them glued up, as often they have screws going in from both sides.
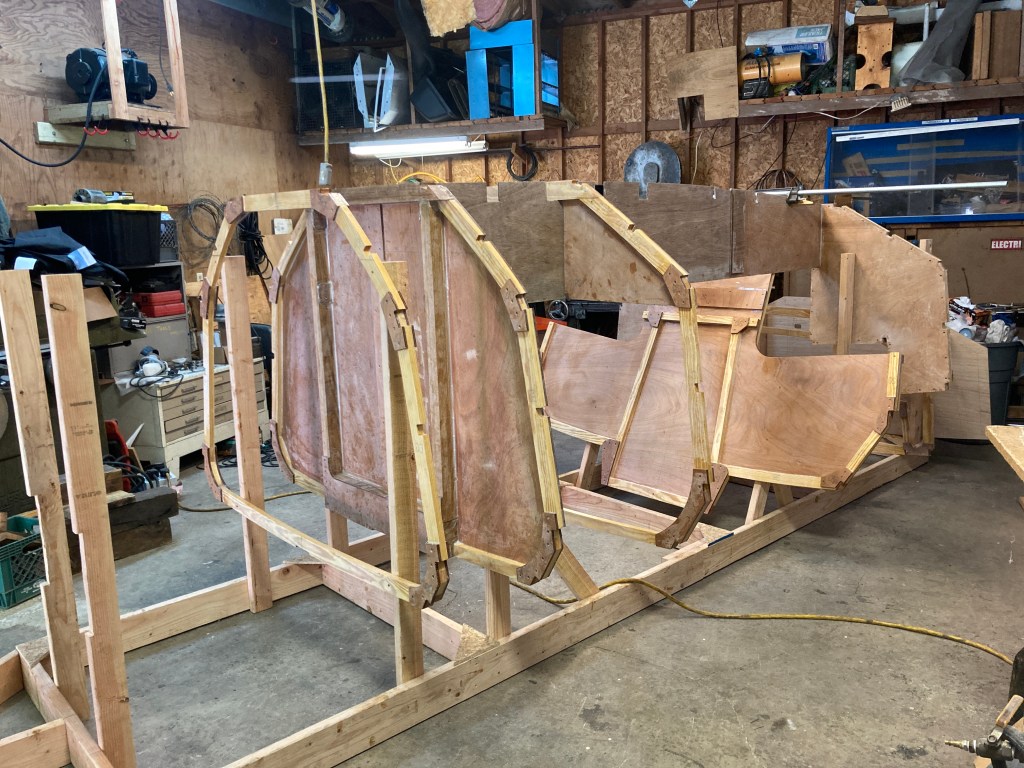
Once I had built frames A, C, and D1 I was able to begin hanging them on the strongback jig. I epoxy coated the bunk side pieces as well as their corresponding butt blocks and joined them together with more thickened epoxy. This allowed me to assemble the ‘box’ which makes up the boat’s little salon. It is important to remember to assemble and finish frame C first as it needs to be threaded onto the bunk sides before they are glued into the boat.
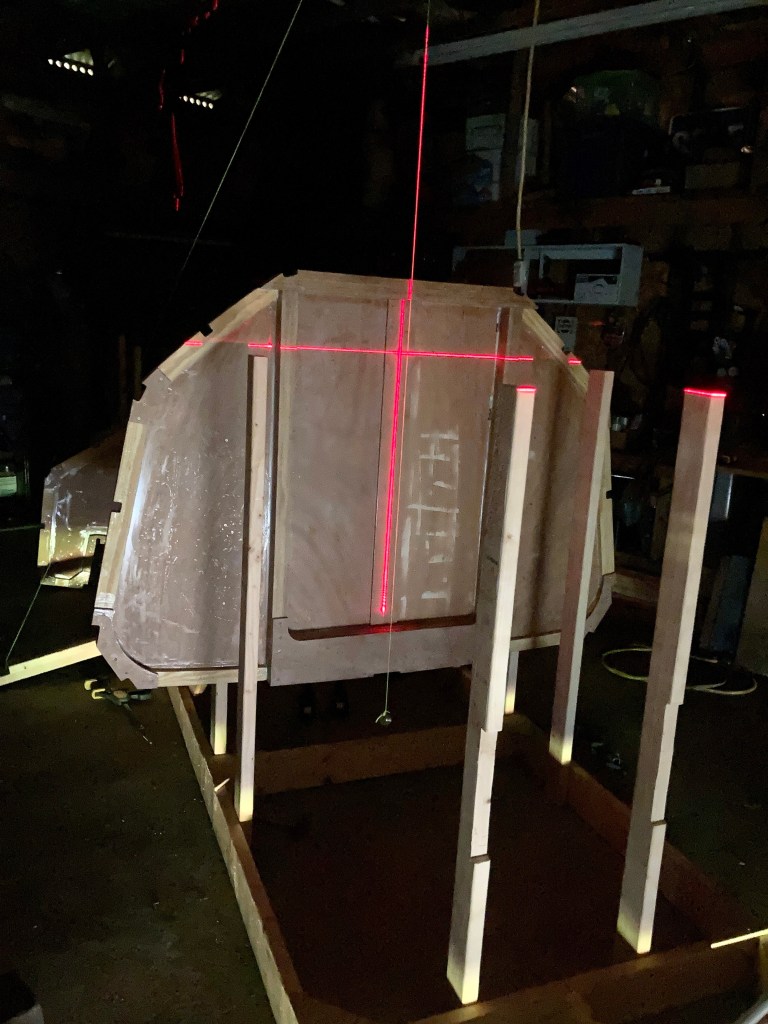
In order to get the frames hung in the right places I used a combination of laser level on a tripod, plumb bob hung from the rafters, and my trusty class 1 metric tape measure. I would set the laser to line up with the height of the DWL from the plans and the centerline drawn on each frame. I would also line up the plumb bob with the centerline to avoid twist, as well as using it to check plumb from top to bottom. I verified everything with the tape measure and carefully blocked the frames from underneath to support them while I screwed them to the jig. I would also adjust the laser to shoot up the centerline that I have marked on the jig as well as the other frames to ensure correct alignment as I went.


I had to do some fitting of the bunk sides in the corners of the tabs to ensure square angles for a tight fit up to the frames. Once they were fitting well I went ahead and glued them into frames D1 and A with frame C dangling.
Next I assembled and hung up frame S. This is the slanted frame that will eventually house the companionway. Hanging this frame caused me much anxiety as it has no real reference point like the DWL on the other frames, and it has to be at exactly the correct angle to meet up with the cockpit sides. Also frame S is responsible for keeping the giant graybeards that swamp the cockpit from getting into the boat! No pressure!
Needless to say with careful planning it slid right in with some minimal fitting to square up the joints. I followed up frame S by mounting frame D on the jig as well. It went up fairly easy compared to the others and it feels good to be on the downhill side of framing.


I used these same techniques to assemble frames B and E. I still have to mount frame B and E, the stem, knee, and transom. My next post should hopefully cover the fabrication and letting in of the stringers and battens!
Thanks for reading! Josh Kali, hull #157 ‘Casero’
