I love this little boat! Sometimes I cannot tell if I am shaping it or if it is shaping me, perhaps it is a little of both. When I began this endeavor I thought it seemed like the perfect opportunity for an epic adventure, what I didn’t expect was the community aspect of the 5.80 family, and the connections that I would make around the world! Thank you for your support!
With the stringers and battens all glued into the frames I began the laborious process of beveling the frames and stringers and fairing everything together to accept the hull planking.
The first step for me was to epoxy coat the inside of the hull planks in the same way that I had done the frames. Two thick glossy coats followed by sanding smooth. This will help to ensure the inside of the plywood is well sealed against moisture.

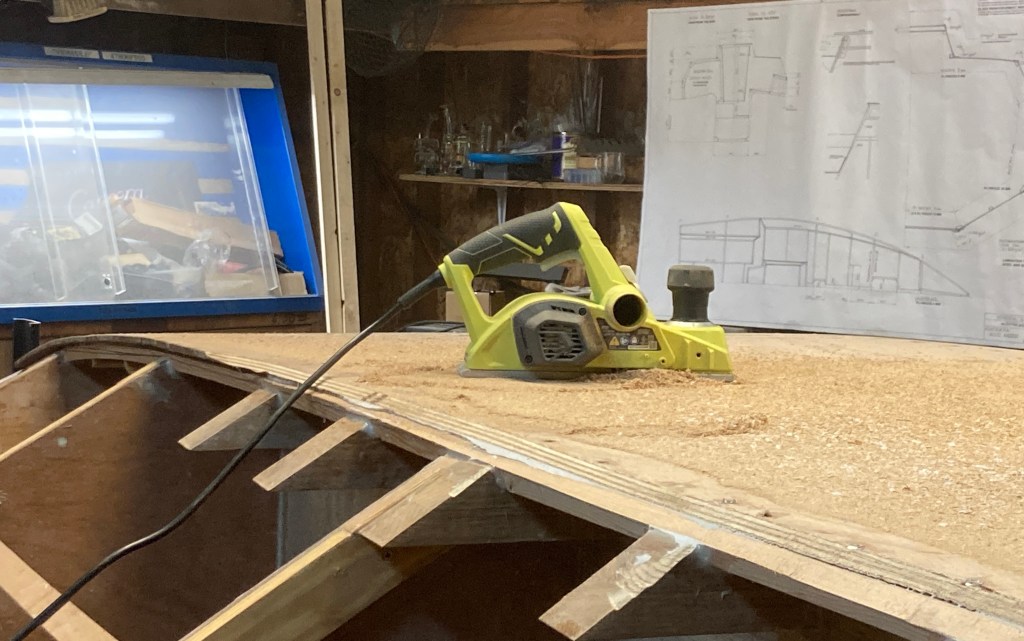
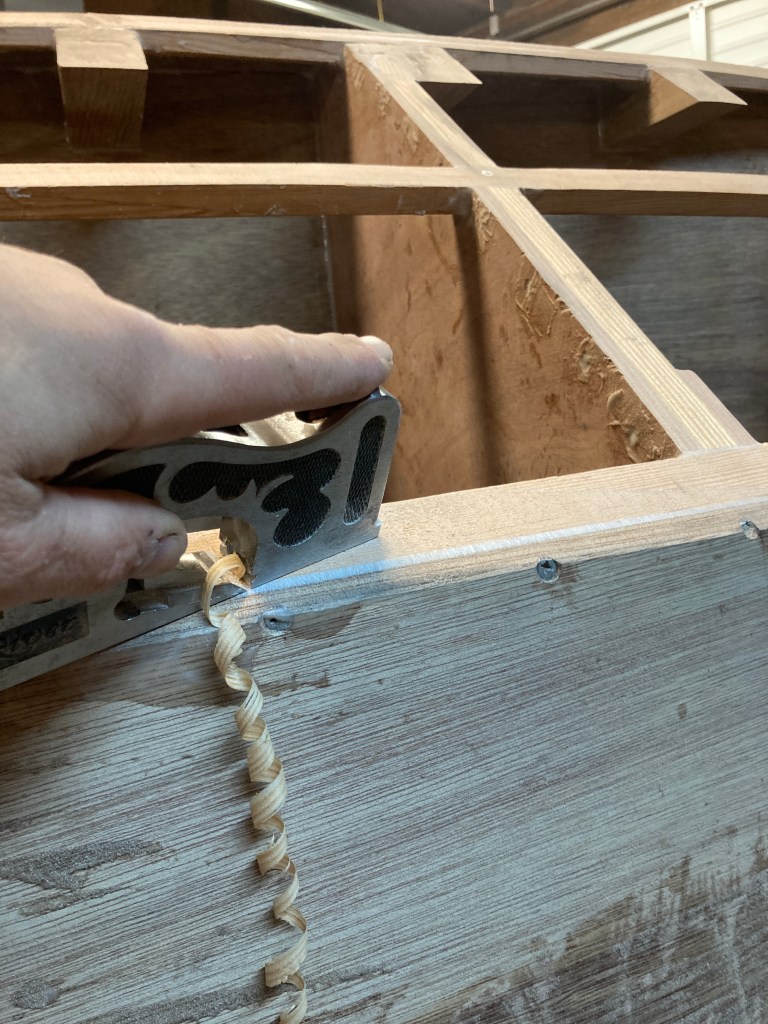
Next I began preparing the surfaces of the frames by beveling off the excess material left outside of the line of planking when I let the stringers into the frames. I did this using a combination of the Ryobi electric plane and a hand plane.
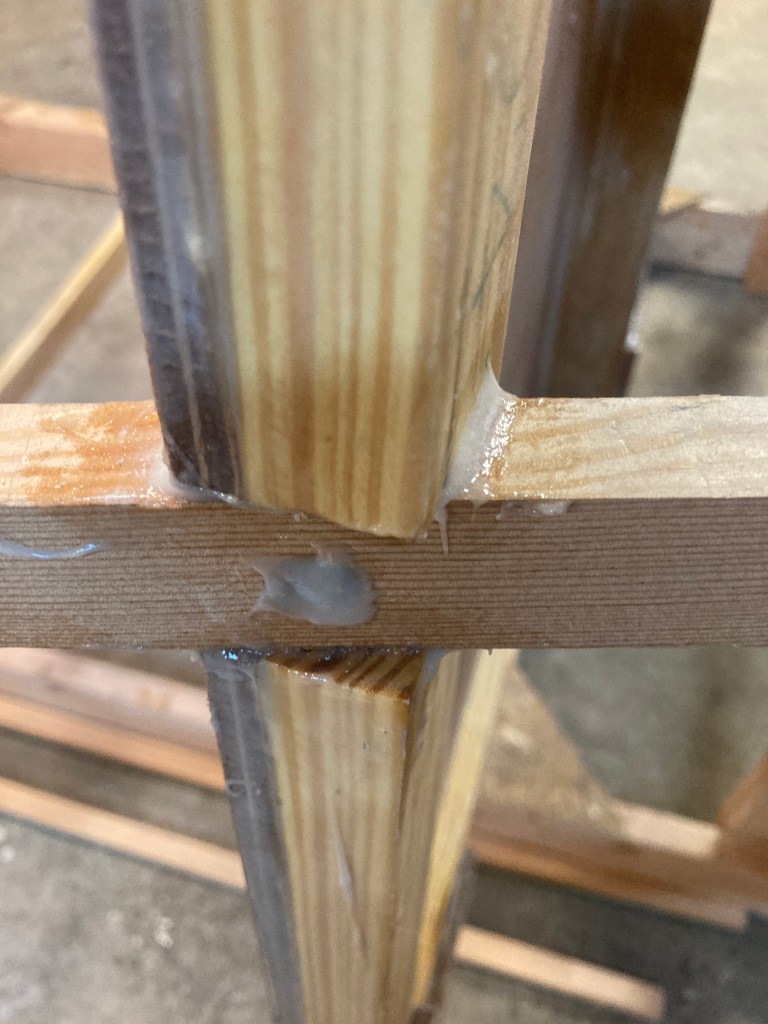
First I beveled the sides of the boat then, once I felt they had a good shape, I used Mirka Black Dry Guide Coat to cover the intersecting frames and stringers and a long board sander to fair everything together. This ensured a tight fit of the panels to the frames along the length of the hull.


I started on the port side and finished on starboard. The panels would practically suction themselves to the sides of the boat at this point. With the initial fairing and beveling complete I was able to attach the first two side panels.
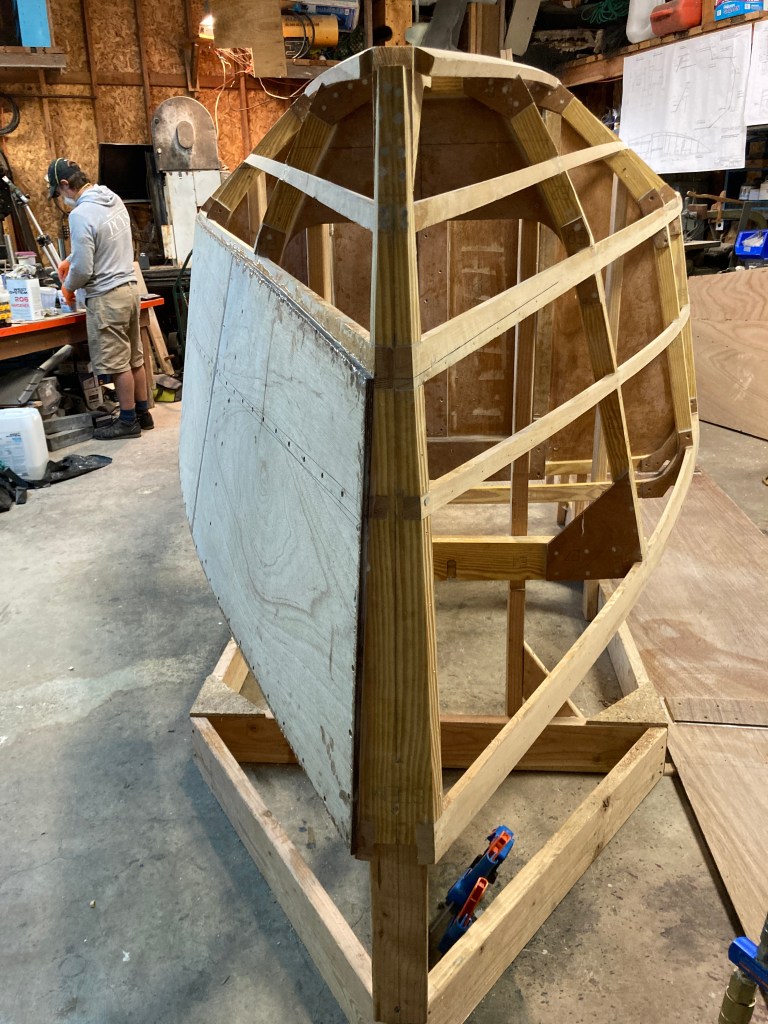
With the first two side panels on I then proceeded to bevel my way upwards, or downwards depending on how you think about it, toward the keel. I beveled the frames in the area of the bottom panels using the Ryobi plane and hand plane combo. I then faired the frames and stringers into each other with the guide coat and the long board just as I did with the sides.
After getting the prep work done it was time to attach the first layer of bottom planking. This went smoothly as I had a friend help me lift the epoxied panels into place.

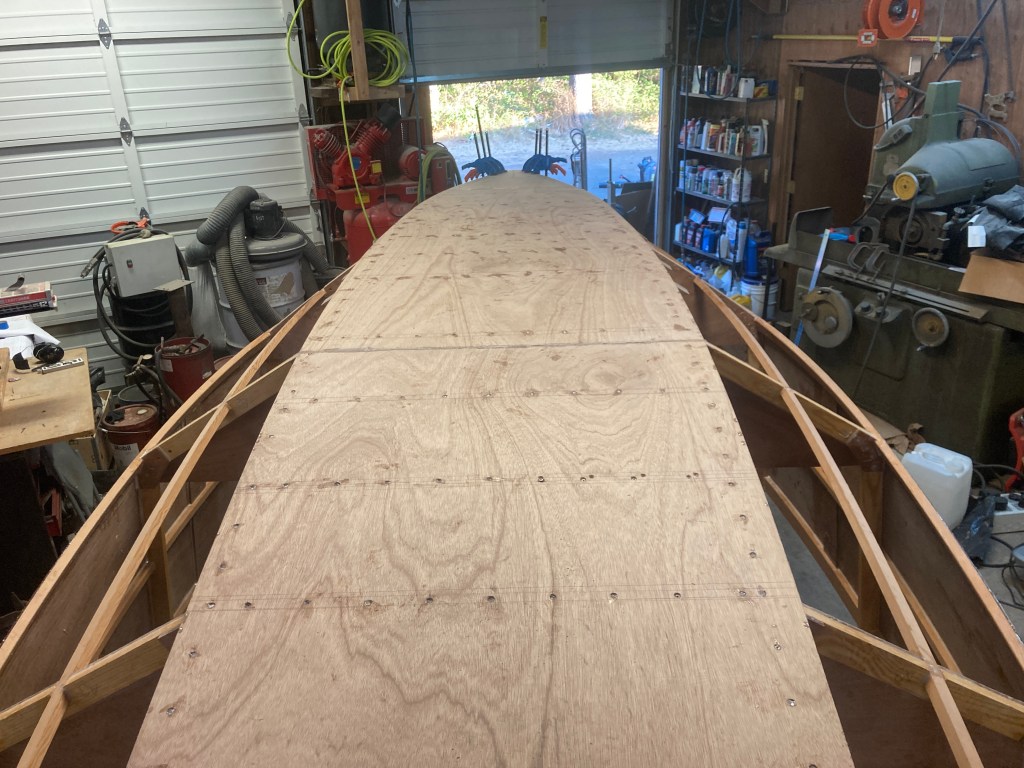
The installation of the first layer of bottom panels led me to the chine panels. I beveled the frames, stringers, side panels and bottom panels all together and then I faired it all using the guide coat and long board again before finally attaching the chine panels and closing up the hull.
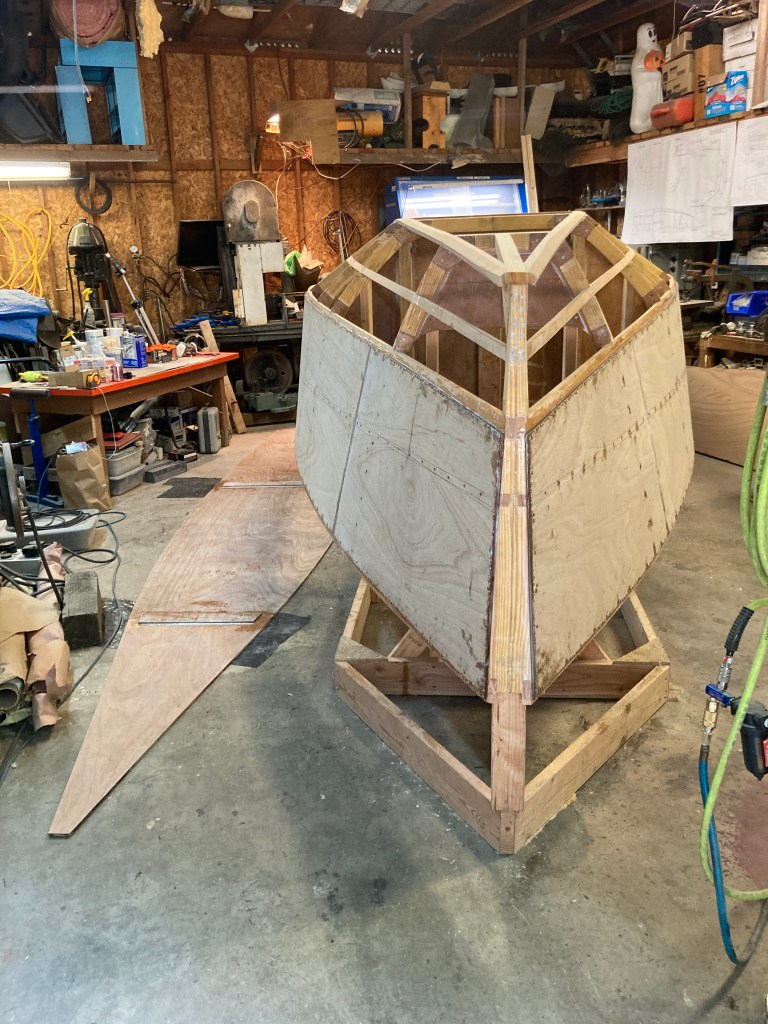
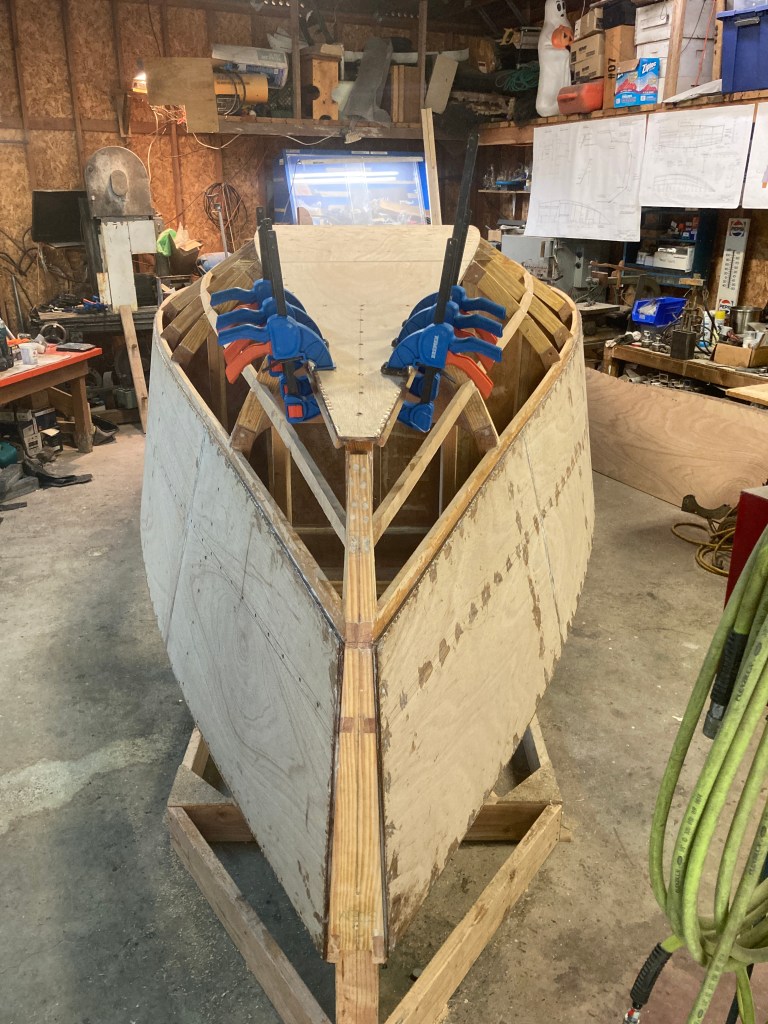
It was not too difficult to twist the panels into place at the front as I had already done the prep on the surfaces which made for an easy fit. I used a combination of a large ratchet strap around the boat, some clamps and carefully pre drilled and installed screws. When it came time to attach the panels I was able to get them to cooperate with only the screws by tightening them progressively.
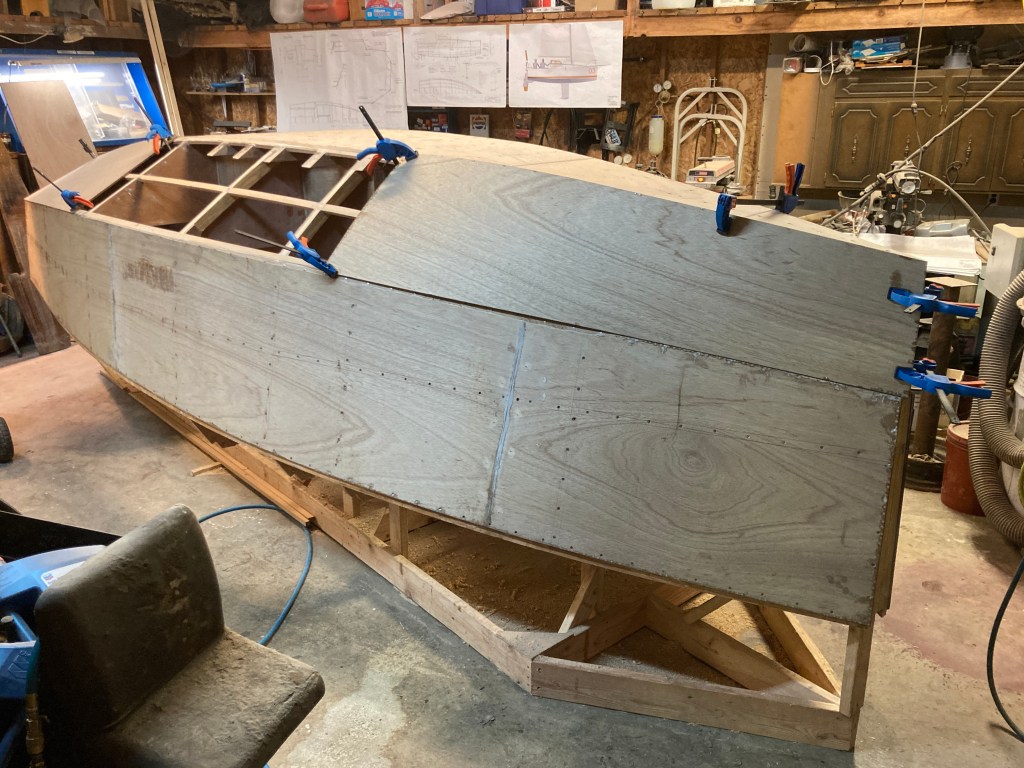


Closing up the hull was a major milestone and it felt very satisfying to sit under the boat and look up at the inside!
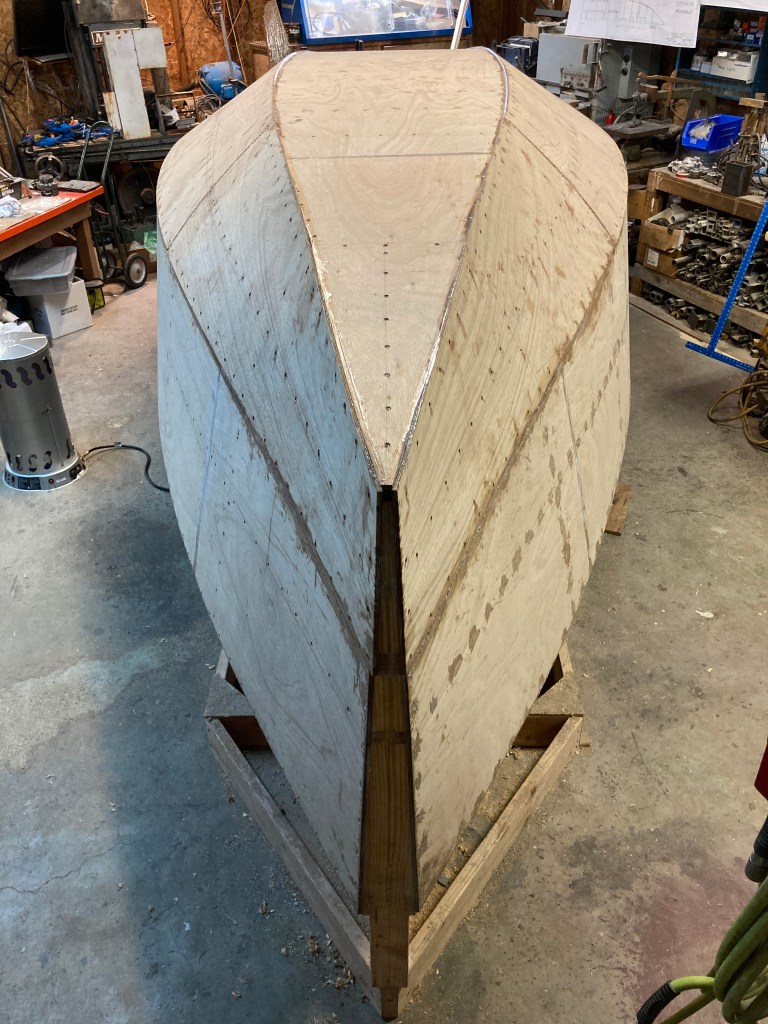
The last step for the panels was to bevel off the chine planks where they meet the bottom and then attach the second layer of bottom planking. This resulted in a very strong overlap between panels. I used thickened West System 105 epoxy to bind the second layer of bottom to the first. It is a bit heavier than polyurethane glue but definitely stronger. I drilled many weep holes in the plywood to ensure good squeeze out and gap filling.


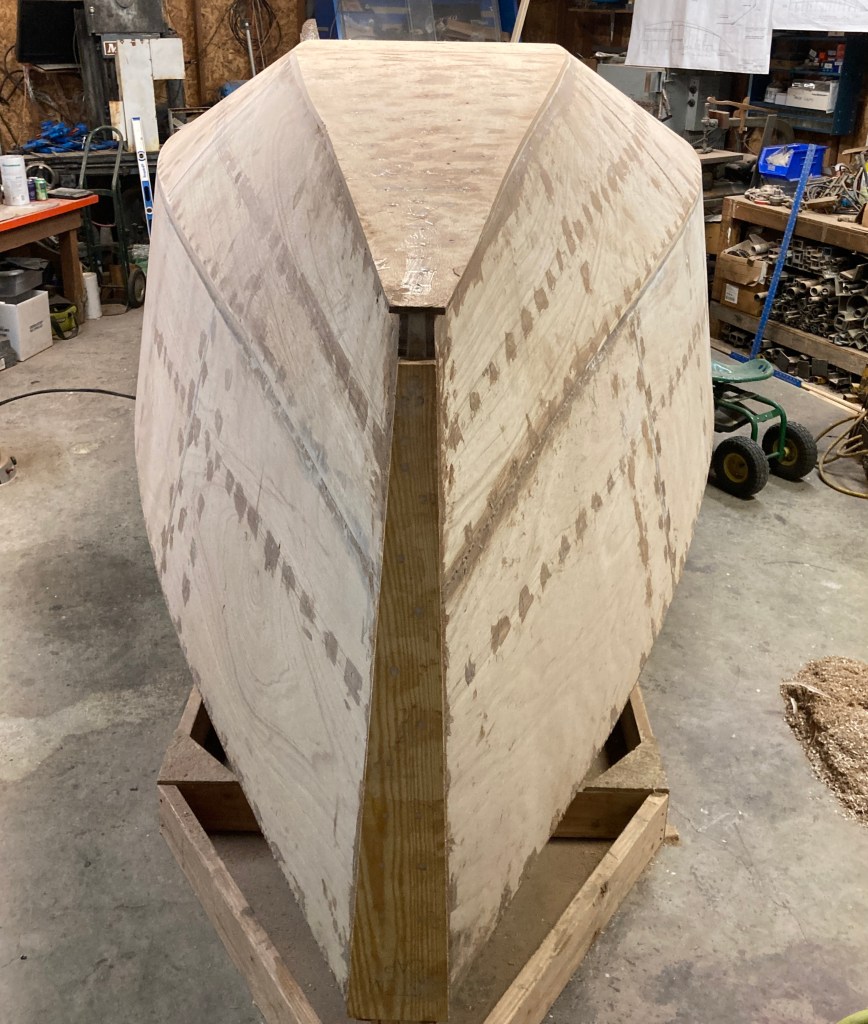
Finally it’s starting to look like a boat! Getting the hull planked was a big step and now it is on to shaping it up a bit, taping the seams with fiberglass and then covering the hull with 600g/m2 of 1708 fiberglass cloth. Then it’s time to fair the hull to shape! Thanks for reading!
