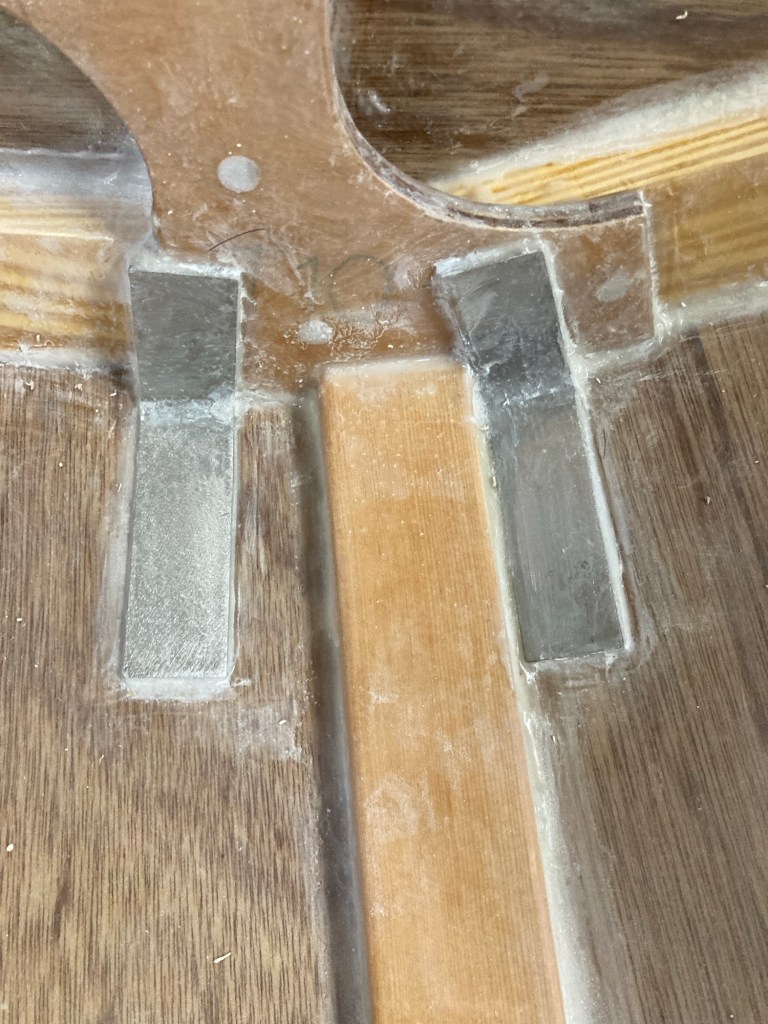
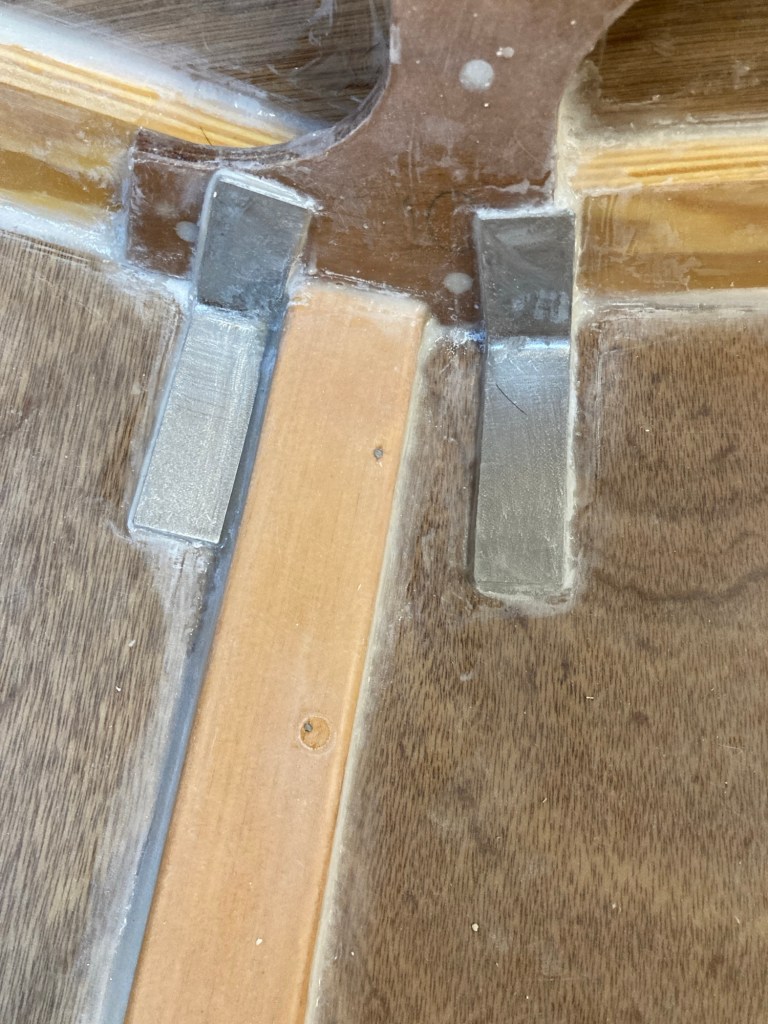
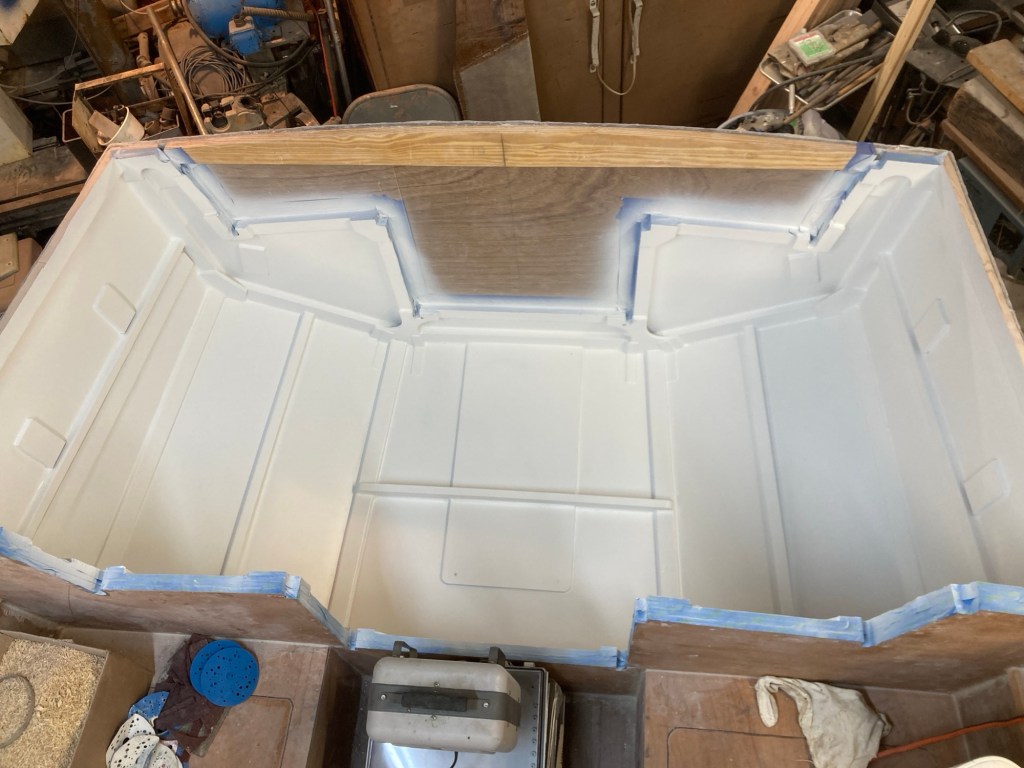
Now that the deck was all closed up I was ready to finish up the cockpit. I began by doing a bit of pre planning for future systems and adding reinforcements for various hardware. First up I added the stainless steel brackets from the Globe 5.80 stainless package to the transom. These will provide strength and support for the installation of the daggerboards on the stern.
I bent the pieces of flat bar in the vise and fitted them to the inside of the hull in the location of my pre drilled holes for the daggerboards supports. I then bonded them in place with more of the West 105 / 404 filler mixture. I did not bother to drill the holes in the floor until after I had painted the space, no real reason, it just worked out that way. The inboard ones overhung the plywood slightly but a thick fillet of epoxy made quick work of that.

Next up I added some small blocks of epoxied plywood that I would give me something to screw the clamps to when I eventually run my bilge pump hoses. I also added a strip of coated ply on the stbd side that will hold my wire chase for the electronics mounted on the transom.
This time in order to bond the plywood to the hull I used an awesome industrial adhesive called Plexus. It is a lot like weld-mount if you’ve ever used that, only much stronger. They make many different types of Plexus and the type I used has the same strength as epoxy when cured, is thixotropic, and it cures to hard in 20 minutes and fully cured in 24hrs. I have no doubt that I could have built the boat using this adhesive as it is remarkably strong.
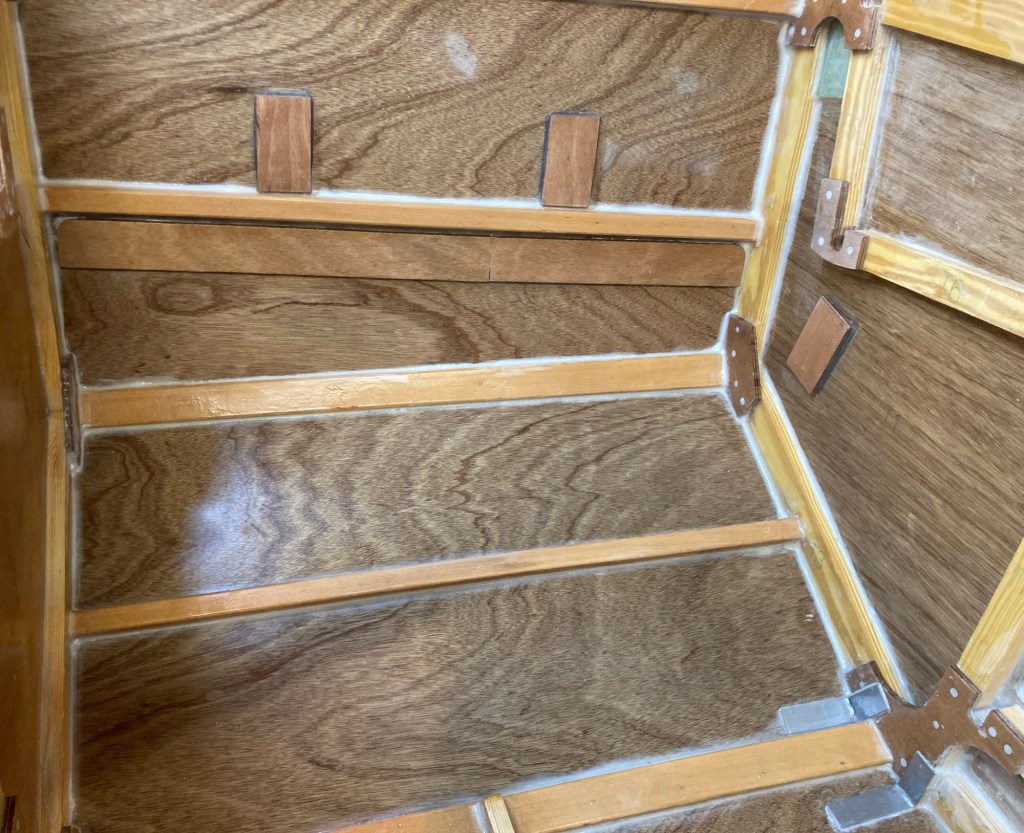
I also added some pieces of 1/4in (6mm) G-10 plate to the transom inside the coaming to act as backing plates for the running backstay chain plates. At this point I glued in the floor beam that goes across the floor of the cockpit. This was a cool moment for me because it was the last of the pine beams that came in the kit to be installed. It’s the little milestones like that that keep the project moving!
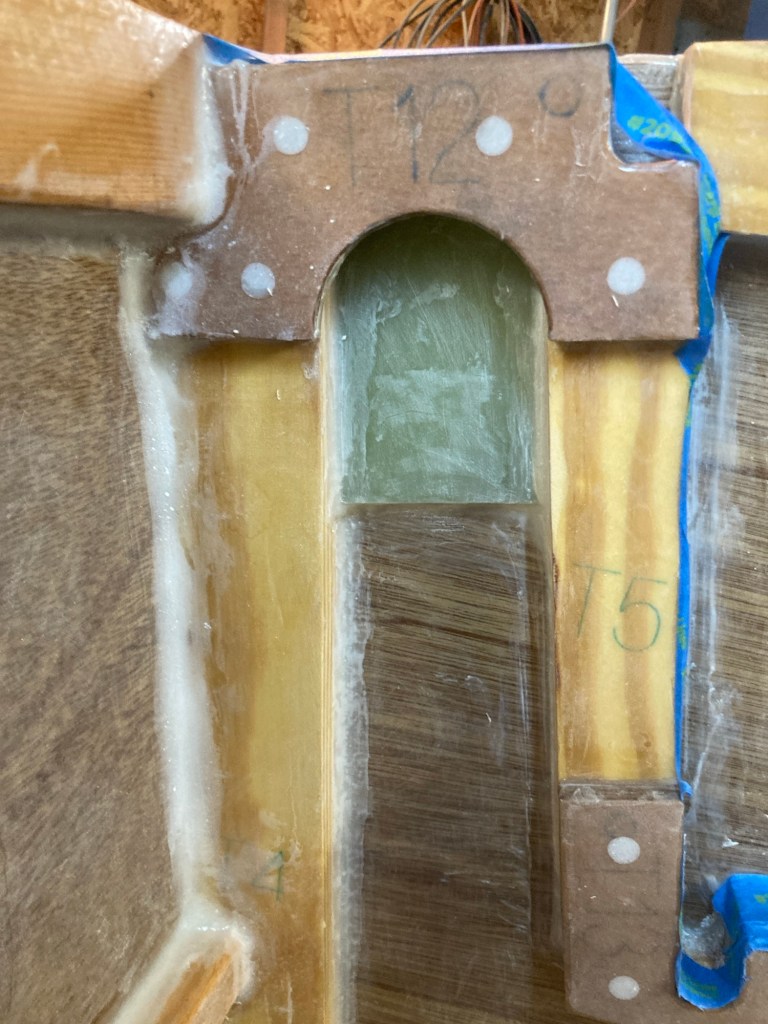
In order to get the hoses from both the manual and electric bilge pumps to their thru hull discharges on the transom I made some pass throughs in the Frame A bulkhead. I used a hole saw to cut holes in the plywood and then I glued in some short lengths of fiberglass tube, 2.75in (7cm) on the port side and 1.75 (4.5cm) on starboard. Once the bilge hoses are run through the tubes they will be sealed in with Sika Flex 291 making the passages water tight.
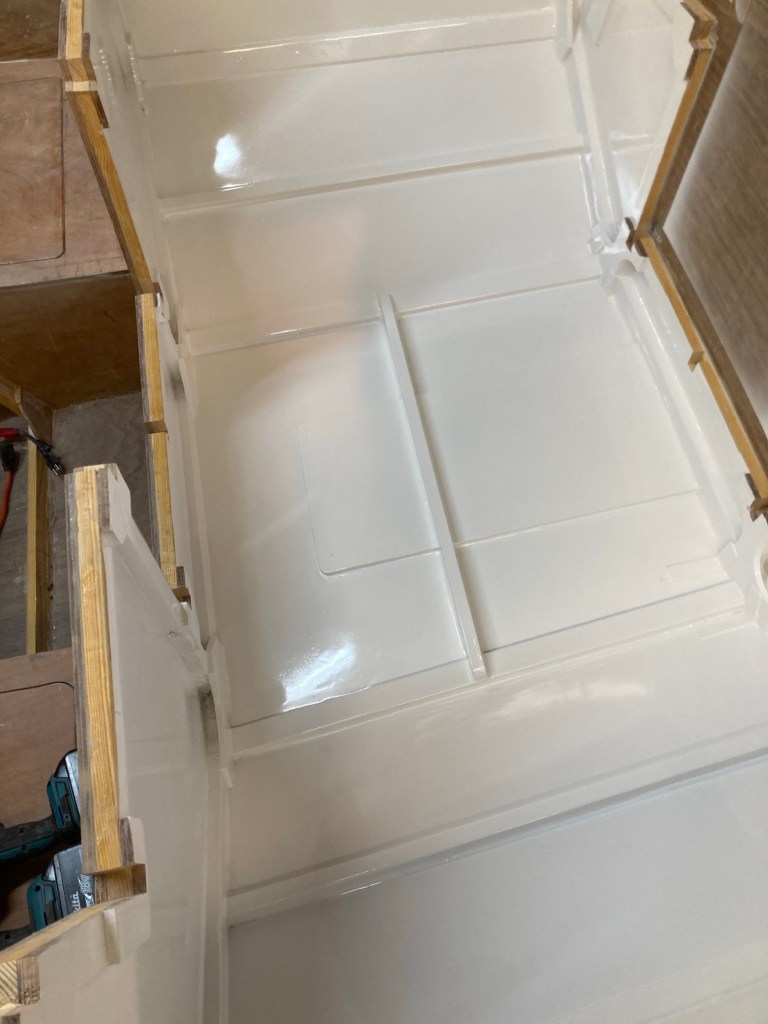
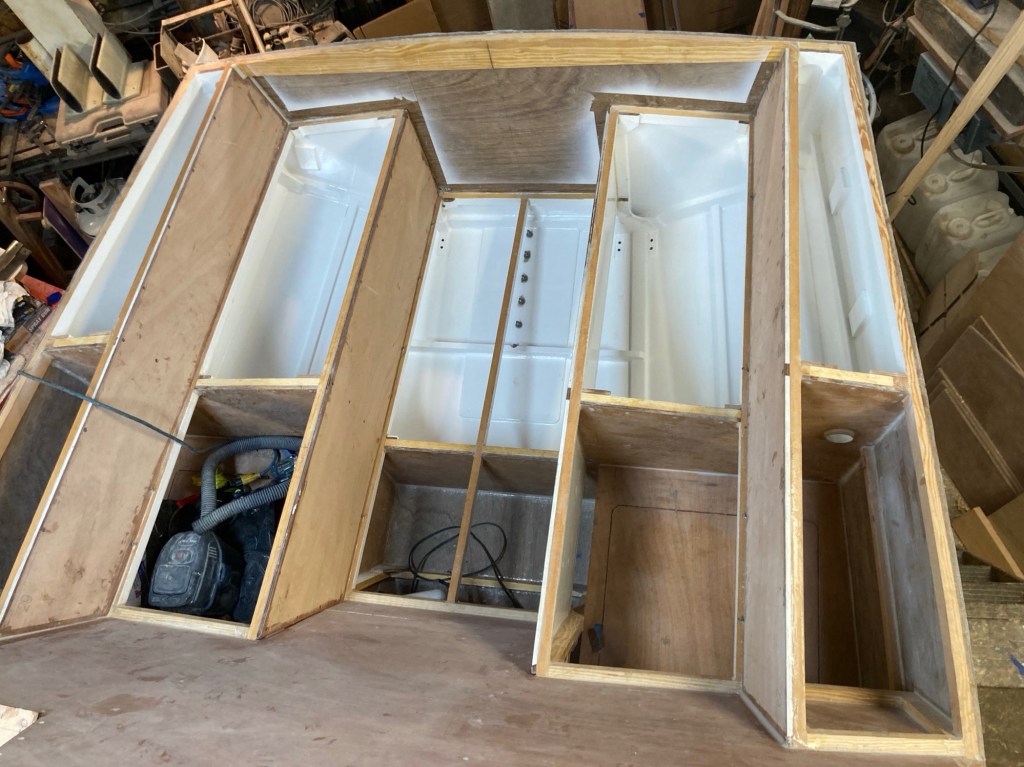
To make it easier on myself I wanted to paint the cockpit space before adding the framing for the panels and with all of the little bits finished up I began prepping the surface. I also painted the underside and insides of the paneling simultaneously alongside the hull. I used the same process as all of the other interior spaces so far. First I sanded the fillets and panels with 150 grit paper before spraying in two coats of Alexseal 442 finish primer. I sanded that with 320 grit and then sprayed on a third coat of primer. Once that cured, I sanded it smooth once more with 320, cleaned everything up the best that I could, and sprayed in two coats of Alexseal 501 Snow White topcoat. I let that dry, sanded it with 320 grit and then sprayed in the final topcoat. It looked pretty good for cockpit locker storage but I was really just practicing for the interior later. To that end I went ahead and wet sanded it 1000 grit, 2000 grit and then buffed with light and then superfine compound. I am a bit of a nerd when it comes to finishes.
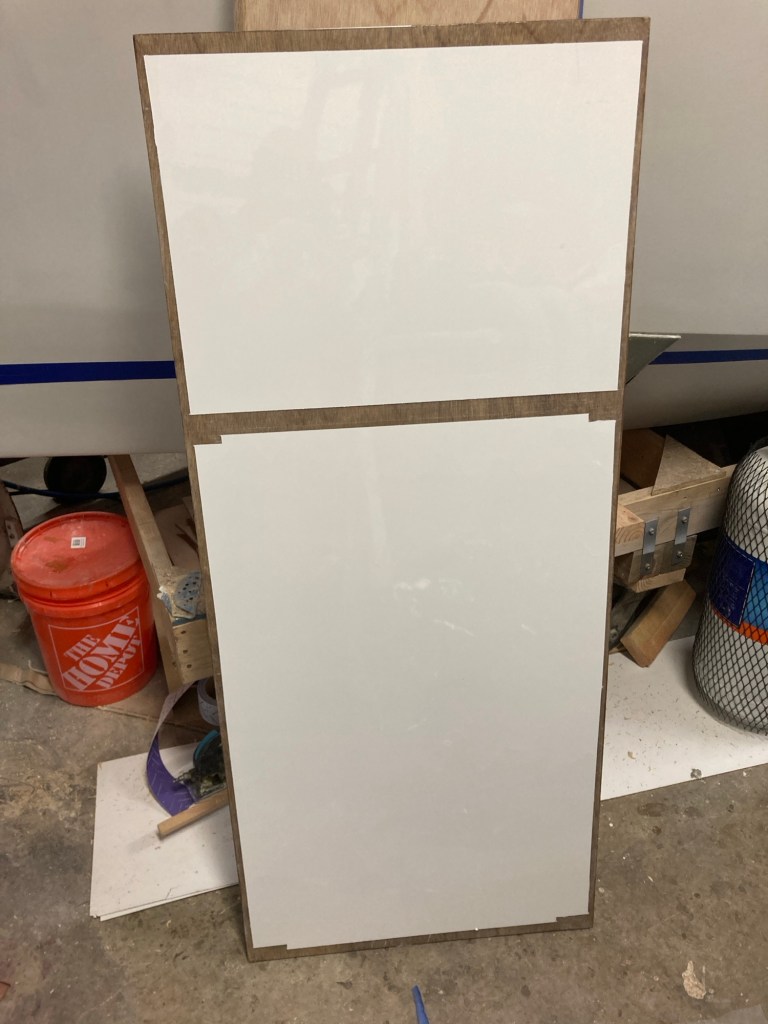


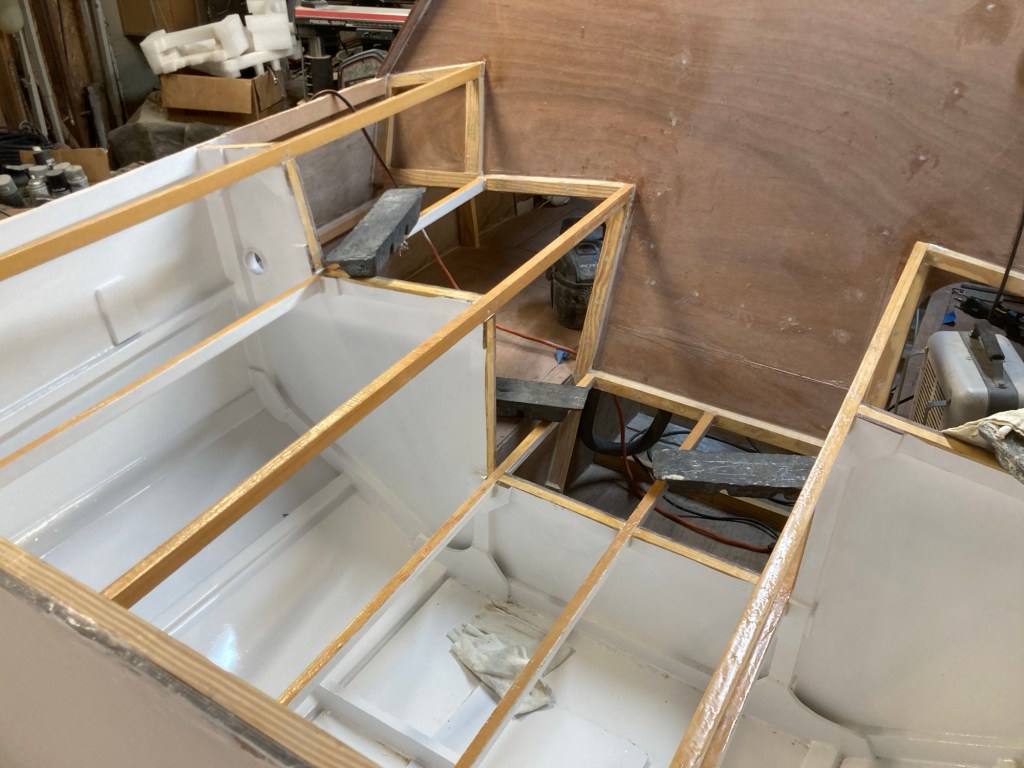
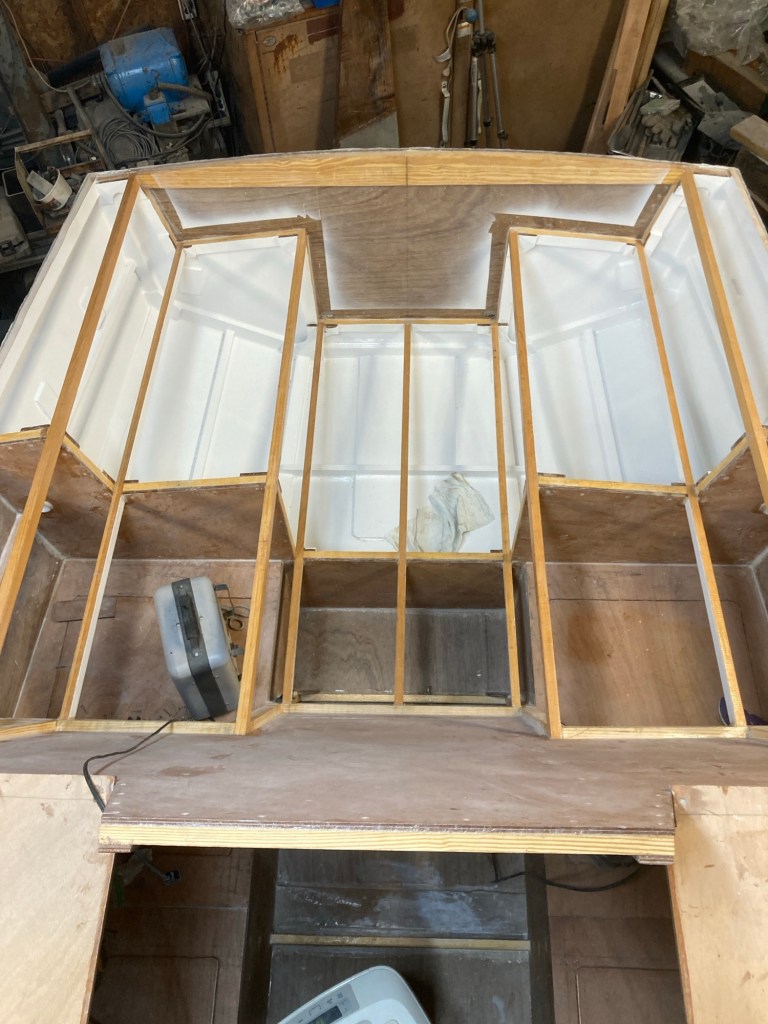
While waiting for the paint to dry I went ahead and fabricated the stringers that make up the framing for the cockpit floor, seats, and coaming. With another trip down to Crosscut Hardwoods for a bit more Clear Vertical Grain (CVG) Douglas Fir I was ready to begin. I cut them to width and length on the bandsaw, planed them square on the jointer and rounded the edges that would remain exposed on the router table. I chose to add one additional stringer not in the plans down the centerline of the cockpit to give the floor more support. After that I painted the surfaces that wouldn’t get adhesive, glued them into the boat, and began fitting the panels.

It was at this point that I attached the skeg to the bottom of the hull. I wanted to do it before putting the paneling down for good, but that’s a story for another time!
Framing complete and panels fitted and painted, it was time to seal it up. I glued the seat backs and sides of the footwell in first, followed by the floor. Next I did the top of the coaming but not before adding some more 1/4in (6mm) G-10 plate to the aft end of the coaming tops. These pieces will provide reinforcement for the cleats that will be installed there to ensure that they are super strong for towing a drogue or warps.
Before I put down the seat tops I cut in the holes for the hatches, mainly so that I would be able to fillet their undersides when I glued them in. With that done I went ahead and installed them permanently which also closed up the cockpit completely.

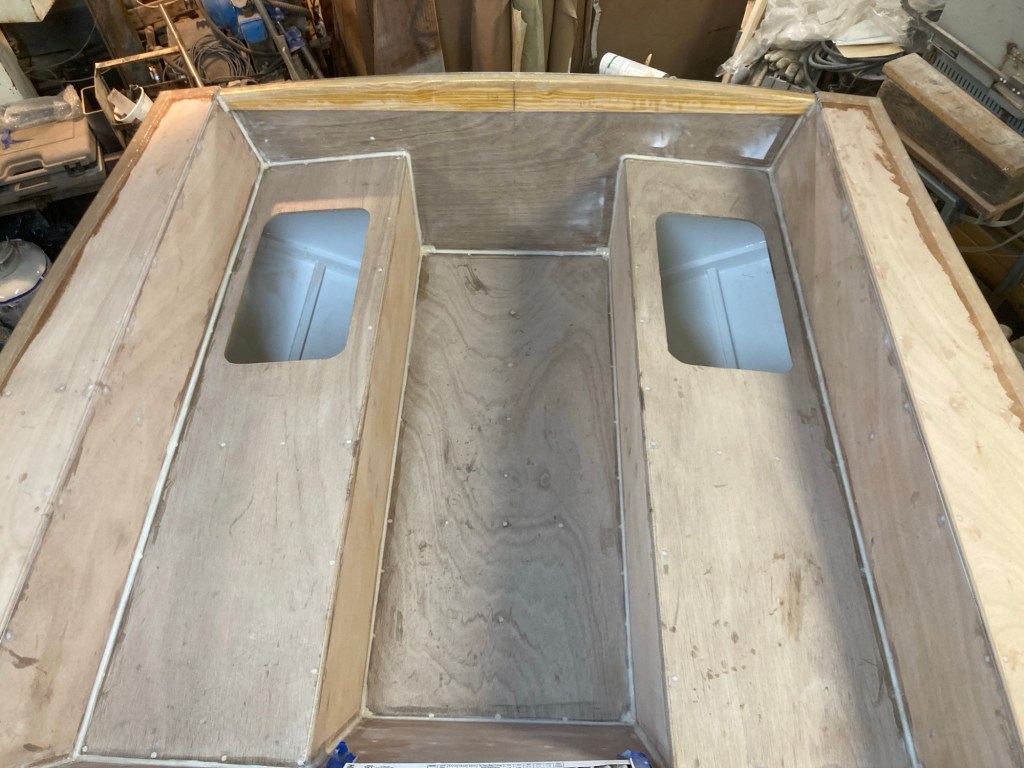

To finish it off I went around and added nice thick fillets of epoxy to all of the joints. This helps increase the strength of the seams but also provides a nice radius for the fiberglass tape and cloth to come later. Now on to the interior, thanks for reading!
